Realism Tutorial! (LMT)

11 comments

diddlydaisy[OP]
05.06.2021 05:43
LinkTyping...

diddlydaisy[OP]
05.06.2021 05:47
LinkSo! I thought I would sit down and talk about some tips and tricks for trying to draw Realism!
There are a lot of realism artists on this website which includes Promagma, Cookie, and some other rlly talented people that I can't really think of from the top of my head!
Little did you know you, it's actually SUPER easy to draw realism! While you do need a little drawing experience, the methodology behind it is more or less just shape theory and hand-to-eye coordination. I hope this text tutorial will be a little helpful for those who are looking to try and achieve an art style like some of the rlly big people on here.

diddlydaisy[OP]
05.06.2021 05:56
LinkLet's start with ✨inspiration✨
Where should I /FIND/ pieces I can reference?
With my "big-juicy" post, I actually used Pinterest to find a little inspiration / the photograph reference! There's a lot of really good photography on there that you can use to either reference from, or draw inspiration from.
Google is also pretty good for photo references, if you have a particular idea in mind that you'd like to draw you can search up keywords. I think that's pretty self-explanatory.
Please be mindful that sometimes there may be photograph that it edited. I think it's important that you respect photomanipulation art (which is where you can photobash to create new pieces of artwork.) If you do draw reference from photomanipulation, make sure you credit back to the original artist / photograph. I think that goes for most pieces / photographs referenced, as photograph in itself is an artform and should be respected! If you can find the original artist; link em!

diddlydaisy[OP]
05.06.2021 06:00
Link(also please excuse some of my spelling mistakes </3 brain goes dump sometimes)
So how do you /ACTUALLY/ get your idea onto Flipanim?
You're gonna actually need another program if possible, this works especially well for Desktop users who can have multiple programs open & next to each other for reference.
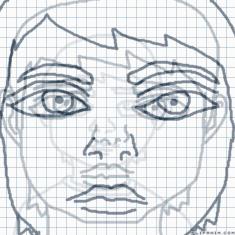
The Beta Editor (and I think the regular one too?) has a very VERY useful grid that can be used for a pretty common art technique, which is using an Art grid. The Grid method is a very easy concept to get used to.
There's an article on this method here if you'd like to take a read at it!;
https://www.art-is-fun.com/grid-method#:~:text=The%20grid%20method%20is%20an,want%20to%20paint%20or%20draw.&text=In%20a%20nutshell%2C%20the%20grid,%2C%20wood%20panel%2C%20etc).

diddlydaisy[OP]
05.06.2021 06:04
LinkUsually was I do is open an art program that has layers (my go-to is Paint Tool Sai2, but FireAlpaca is a free alternative as well!).
You can either screenshot or copy&paste the base grid of FlipAnim into your secondary art program. It'll probably look something like this!
(this is my set up for the grid!)
http://prntscr.com/1456jxz
It's important that you number the little boxes on the x & y axis, that way you can constantly reference them to see where things align on each grid.

diddlydaisy[OP]
05.06.2021 06:08
LinkThen, in your art program you just paste in the artwork that you want to draw! Because you're using the same grid, you reference where each box meets and draw in the corresponding lines.
Here's a visual example!
http://prntscr.com/14576hu
I'm using a pretty simple cut-out of a lighter with a smiley face. Also, since I'm doing this in another art program, I can lower the opacity of my reference to see the grid lines. This is important if you want to make sure your transfer is accurate. :]

Following the numbered grid lines, you correspond your strokes to the art program reference.
Usually I start out with a sketch first, and then I block in with base colors on different layers.
This little tool right here?
http://prntscr.com/14592jg
The most useful brush to use if you want to color in linework without having to go over it again. It will only draw on linestrokes you've made on specific layers. I use this little brush to shade in the blocks of colors I've used. I still reference the art program grid occasionally to see where colors need to be placed, but from there it's smooth sailing!

How do I get the colors right!! You might be asking.
That's where the eyedropper tool comes in 😌🙏
You can color drop different colors in your art program, and then inspect the color you've gotten to get it's Hex Code.
http://prntscr.com/1459kef
Hex codes are important if you want your colors to match up to your reference image. The little "#" in the reference picture is the hex color I picked from the lighter reference. You're going to want to copy that, and then go into your flipanim file and pick a color from ur little color tray to replace with the color you want. Paste it in there baby!
http://prntscr.com/1459vpd

It's just going back and fowards with the techniques I've described pretty much until you come to a result that you're proud of, or that you deemed finished! It's also important to note that sometimes you'll want to dilute your color's saturation on flipanim, as they don't apply as smooth as some art program brushes. Having a low saturation on certain brushes can help you easily get gradient techniques like sunsets, shading, and even highlights.
